Hey all, hope you're having a good week! I've had a lovely time catching up with lots of friends and family - and been out for lunch a lot!
Today i have a card to share with you created by my Sister Jamie, using the beautiful 'Natures Nest' stampset:
I think you'll agree this stampset is simply stunning and could be used in so many different ways - i can't wait to get playing with it!!
Anyway here is the card that Jamie made with this set:
She stamped the tortoise image using 'Basic Black' ink onto 'Whisper White' card, she mounted this onto 'So Saffron' and the 'Pool Party' card. Onto a card base she layered some 'Domestic Goddess DSP', then some 'So Saffron' card and then some 'Pool Party' card (ran through the 'Big Shot' using the 'Square Lattice Embossing Folder' to create a textured effect.) She used 'Dimensionals' to raise each layer. Finally she punched some '1/2" Circles' from some 'Pool Party' card, punched a hole in the centre of each one and placed a 'Brad' through each one, positioning them at the bottom of the card.
I love this card and design. I think it is a fab way of showcasing a beauriful image and with the addition of a sentiment could almost suit any occasion!
If you would like to purchase this stampset or anything else in the Stampin' Up! catalogue why not email over an order: amyjtidd@gmail.com and don't forget if you make an order of £45 or more you will also recieve a pack of DSP for FREE!!
Amy Tidd - Independent Stampin' Up! demonstrator. Operating in the Surrey/ Hampshire area.
Showing posts with label 1/2" Circle Punch. Show all posts
Thursday, 12 April 2012
Wednesday, 11 April 2012
X-Box Birthday Card!
Today i have a card for the guys, my hubby and all of his friends are X-box fanatics. So it made sense to make my hubby's best friend, Dave a birthday card along the XBox theme. I originally attempted to cut out a cardbase shaped as an X-Box controller, but quickly got fustrated by my complete inability to cut in a straight line, so headed to trusty Google to seek an alternative design and ended up CASEing a card by CraftingClaire.
This card is inspired from an X Box controller. The cardbase is 'Very Vanilla'. The 'Birthday Wishes' sentiment is from the 'Happiest Birthday Wishes' stampset inked in 'Basic Gray' onto a strip of 'Very Vanilla' and then mounted onto a strip of 'Basic Grey' before being glued onto the card base. Next i punched out four '1/2" Circles' from 'Real red', 'Pacific Point', 'Certainly Celery' and 'So Saffron' card on which i drew on by hand (using the same colour 'Stampin' Write Marker' an 'A','B','X' and 'Y' and attached them in place using 'Dimensionals' to create a raised 3D effect. I then punched out several '1/2" Circles' from 'Basic Grey' card and randomly glued them in place across the card.
I simple card which goes to show you don't need a huge craft stash to create the perfect card for people you know. Thats the great thing about making your own cards - you can assure they completely suit the recipient you're sending them to!
I hope Dave had a great birthday on Monday!
This card is inspired from an X Box controller. The cardbase is 'Very Vanilla'. The 'Birthday Wishes' sentiment is from the 'Happiest Birthday Wishes' stampset inked in 'Basic Gray' onto a strip of 'Very Vanilla' and then mounted onto a strip of 'Basic Grey' before being glued onto the card base. Next i punched out four '1/2" Circles' from 'Real red', 'Pacific Point', 'Certainly Celery' and 'So Saffron' card on which i drew on by hand (using the same colour 'Stampin' Write Marker' an 'A','B','X' and 'Y' and attached them in place using 'Dimensionals' to create a raised 3D effect. I then punched out several '1/2" Circles' from 'Basic Grey' card and randomly glued them in place across the card.
I simple card which goes to show you don't need a huge craft stash to create the perfect card for people you know. Thats the great thing about making your own cards - you can assure they completely suit the recipient you're sending them to!
I hope Dave had a great birthday on Monday!
Monday, 9 April 2012
Bank holiday Crafty Session!!
Hey all!!! I have had a last-minute fabulously crafty afternoon with my sisters and my friend Hannah!! I quite literally emptied most of my crafty stash onto the dining room and we just played all afternoon - i have so many creations to share with you over the next few days!!
Now the sign of a good crafty session is a completely messy workspace - so here is us busy crafting away:
Just look at that mess! Hehe! impressive hey?! And here we are showing of some of our finished creations:
So before i go here's a few of the cards that were made today. First up a fab cupcake card created by Hannah:
Hannah also couldn't resist playing with the rest of 'Sale-a-bration' stash... i'm gonna miss those papers :( As well as some retired sets of mine as well as the fabby 'Butterfly Punch' to create this card:
She also CASE'd my window idea that i shared last week to create this card using the 'Patterned Pets' stampset:
Well i think that is enough from me for today - so check back tomorrow to see some more creations from our crafty session!
If you live in the Aldershot area and fancy coming along and having a play with some of the Stampin' Up! products then email me to make some arrangements: amyjtidd@gmail.com You're more than welcome!
Now the sign of a good crafty session is a completely messy workspace - so here is us busy crafting away:
Just look at that mess! Hehe! impressive hey?! And here we are showing of some of our finished creations:
So before i go here's a few of the cards that were made today. First up a fab cupcake card created by Hannah:
Hannah also couldn't resist playing with the rest of 'Sale-a-bration' stash... i'm gonna miss those papers :( As well as some retired sets of mine as well as the fabby 'Butterfly Punch' to create this card:
She also CASE'd my window idea that i shared last week to create this card using the 'Patterned Pets' stampset:
Finally i have a fun little card my little sister made for me - a windmill card created using 'Brights DSP' to create the main building and strips of 'Big Top Birthday DSP' to make the sails'. She used a 'Stampin' Write Marker' to draw on the door and some 'Bright Brads' in coordinating colours! I'm pretty impressed with this - it's a completely original design and not bad at all for a 9 year old!! So proud of her!!
Well i think that is enough from me for today - so check back tomorrow to see some more creations from our crafty session!
If you live in the Aldershot area and fancy coming along and having a play with some of the Stampin' Up! products then email me to make some arrangements: amyjtidd@gmail.com You're more than welcome!
Monday, 19 March 2012
Crafty Boots Challenge: Easter!
It's Crafty Boots Challenge time!! This fortnights challenge is unsuprisingly: EASTER!!! This fortnight we want to see your Easter creations!
So today for inspiration i have my DT creation to share with you:
It's a super cute Easter Chick created using the fabulous 'Top Note Die'! I have to be honest i was inspired by several versions of this online but tweeked it to make it my own.
The cardbase for this card is 'Pumpkin Pie'. The chick has been created from a 'Daffodil Delight' 'Top note' (created using the 'Big Shot') which i edged with 'Pumpkin Pie' ink applied with a 'Sponge Dauber'. His wings were also created using this technique created from a 'Scallop circle' cut in half! and his spiky hair was created by punching some card with the '5 Petal Flower Punch'.
His beak has been punched from some 'Pumpkin Pie' card using the 'Large Heart Punch' and then his eyes were glued on top, created by punching out two '1-1/4" Circles' from 'Whisper White' card and two 'Basic Black' '1/2" Circles'. His eyelets created from a 'Daffodil delight' '1-1/4" Circle' cut in half!
I cut a 'Pumpkin Pie' 'Scallop Circle' into quarters and used two parts to create his little feet, and finally finished him off by tying a bow (from retired ribbon) and sticking it place on his head!
Finally the sentiment is from the 'Teeny Tiny Wishes' set, inked in 'Pumpkin Pie' ink and then punched out using the 'Word Window Punch'.
I look forward to seeing your Easter themed projects - don't forget to enter them into the Crafty Boots Challenge!!
(Don't forget if you like the look of any of the products that i have used in this project you can order them through me! Why not check out the catalogues on the righthand side of this blog and then email over your order to amyjtidd@gmail.com
So today for inspiration i have my DT creation to share with you:
It's a super cute Easter Chick created using the fabulous 'Top Note Die'! I have to be honest i was inspired by several versions of this online but tweeked it to make it my own.
The cardbase for this card is 'Pumpkin Pie'. The chick has been created from a 'Daffodil Delight' 'Top note' (created using the 'Big Shot') which i edged with 'Pumpkin Pie' ink applied with a 'Sponge Dauber'. His wings were also created using this technique created from a 'Scallop circle' cut in half! and his spiky hair was created by punching some card with the '5 Petal Flower Punch'.
His beak has been punched from some 'Pumpkin Pie' card using the 'Large Heart Punch' and then his eyes were glued on top, created by punching out two '1-1/4" Circles' from 'Whisper White' card and two 'Basic Black' '1/2" Circles'. His eyelets created from a 'Daffodil delight' '1-1/4" Circle' cut in half!
I cut a 'Pumpkin Pie' 'Scallop Circle' into quarters and used two parts to create his little feet, and finally finished him off by tying a bow (from retired ribbon) and sticking it place on his head!
Finally the sentiment is from the 'Teeny Tiny Wishes' set, inked in 'Pumpkin Pie' ink and then punched out using the 'Word Window Punch'.
I look forward to seeing your Easter themed projects - don't forget to enter them into the Crafty Boots Challenge!!
(Don't forget if you like the look of any of the products that i have used in this project you can order them through me! Why not check out the catalogues on the righthand side of this blog and then email over your order to amyjtidd@gmail.com
Saturday, 3 March 2012
Jades Crafty Catchup! My minibook project! (with tutorial!)
Today i have had a fabulously crafty day!! Jade hosted a wonderful Stampin' Up! crafty session. There was six attendees and we all designed and demo'd a project to one another. So at the end of the day we had six different creations to take home!! It was a brilliant idea of Jade's to arrange a day like this because everyone had a completely different style and used a complete range of Stampin' Up! products - it was SO MUCH FUN!
So tonight i want to share with you the project that i designed and shared with my crafty friends. It's a folded minibook, with little pockets that you can place little momentos and photos in and it features some of my most favourite Stampin' Up! projects. So here it is:
The mini-book is made from a piece of 'Lucky Limeade' card. A4 length x A5 width. With a few clever folds, one cut with the guillotine and a bit of 'Red Sticky Strip' you can create this cute little project in no time at all!!
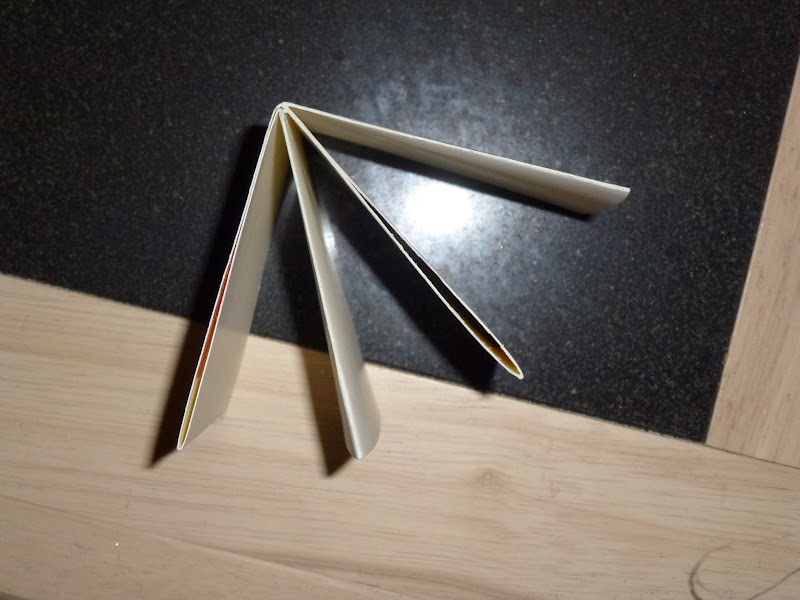
Here's a little demo of how it is done:
And stick everything into place to create your mini-book:
Then it's time to decorate it!!
So there you go!! Hope this little tutorial makes some sense! It really is easy to make and the fab thing is it really doesn't use hardly any cardstock!! I think this would be a lovely project to make for mothers day! Why not give it ago!
Don't forget the beautiful paper i have used for this project you can get for FREE if you make a qualifying Sale-A-Bration order by the end of the month!! So get your order in now. Email me at: amyjtidd@gmail.com and for this month only i will give you FREE P&P on all sale-a-bration orders (usually £4.95)
So tonight i want to share with you the project that i designed and shared with my crafty friends. It's a folded minibook, with little pockets that you can place little momentos and photos in and it features some of my most favourite Stampin' Up! projects. So here it is:
| The front of the mini-book! |
Here's a little demo of how it is done:
And stick everything into place to create your mini-book:
Then it's time to decorate it!!
| Notice that i used the '1.2" Circle Punch' to create some little tabs. You could then place little momentos/ photos etc easily in them!! |
Don't forget the beautiful paper i have used for this project you can get for FREE if you make a qualifying Sale-A-Bration order by the end of the month!! So get your order in now. Email me at: amyjtidd@gmail.com and for this month only i will give you FREE P&P on all sale-a-bration orders (usually £4.95)
Thursday, 16 February 2012
Angry Bird Pig Card!!
Hey all, hope you're having a good week! I'm on halfterm at the moment and having a pretty relaxing week. I'm off this afternoon for lunch with hubby, my sister and my nan. But before i go i want to share with you another Angry Birds inspired card that i made for my hubby's other twin brother, James. (It was their birthday yesterday.)
This card features an Angry Bird pig:
This card started life as a 'Soft Suede' cardbase. On a piece of 'Whisper White' i sponged 'Bashful Blue' ink all over using a 'Sponge Dauber' and the icing part of the 'Cupcake Punch' as a template to create the cloud effect. Along the bottom of the piece of white i glued in place a strip of 'Garden Green' card, handsnipped to create a grass effect.
The pig himself was created from 'Pear Pizzazz' card (and some tiny snippets of 'Whisper White' and 'Basic Black') and a range of punches: '1-3/8" Circle Punch', '1/2" Circle Punch', 'Owl Punch' and the 'Crop-a-Dile' (to create his nostrils and eyes). I drew on by hand his eyebrows and his pupils with a 'Basic Black' 'Stampin' Write Marker'.
The wooden structure was created from some 1cm strips of 'Soft Suede' card glued into place.
The sentiment is from the fab 'Sale-a-bration' stampset 'Elementary Elegance', stamped using 'Soft Suede' ink onto some 'Whisper White' card and then punched out using the 'Decorative Label' punch. I bordered the sentiment using 'Pear Pizzazz' card and the 'Decorative Label' punch.
The twins seemed very impressed with their Angry bird inspired birthday cards! Why not get your punches out and have a go at some punchart! You'll be amazed what you can create from a few punches used in a creative way!!
Don't have any punches to play with? Then why not browse through the Stampin' Up! catalogue and treat yourself!! Don't forget if you make an order before the end of March and it is £45 or more you will also be entitled to a FREE stampset or pack of papers. (I will also give you FREE P&P - RRP £4.95 - this is a CraftythINKer customer exclusive!) Email your order over today: amyjtidd@gmail.com
This card features an Angry Bird pig:
This card started life as a 'Soft Suede' cardbase. On a piece of 'Whisper White' i sponged 'Bashful Blue' ink all over using a 'Sponge Dauber' and the icing part of the 'Cupcake Punch' as a template to create the cloud effect. Along the bottom of the piece of white i glued in place a strip of 'Garden Green' card, handsnipped to create a grass effect.
The pig himself was created from 'Pear Pizzazz' card (and some tiny snippets of 'Whisper White' and 'Basic Black') and a range of punches: '1-3/8" Circle Punch', '1/2" Circle Punch', 'Owl Punch' and the 'Crop-a-Dile' (to create his nostrils and eyes). I drew on by hand his eyebrows and his pupils with a 'Basic Black' 'Stampin' Write Marker'.
The wooden structure was created from some 1cm strips of 'Soft Suede' card glued into place.
The sentiment is from the fab 'Sale-a-bration' stampset 'Elementary Elegance', stamped using 'Soft Suede' ink onto some 'Whisper White' card and then punched out using the 'Decorative Label' punch. I bordered the sentiment using 'Pear Pizzazz' card and the 'Decorative Label' punch.
The twins seemed very impressed with their Angry bird inspired birthday cards! Why not get your punches out and have a go at some punchart! You'll be amazed what you can create from a few punches used in a creative way!!
Don't have any punches to play with? Then why not browse through the Stampin' Up! catalogue and treat yourself!! Don't forget if you make an order before the end of March and it is £45 or more you will also be entitled to a FREE stampset or pack of papers. (I will also give you FREE P&P - RRP £4.95 - this is a CraftythINKer customer exclusive!) Email your order over today: amyjtidd@gmail.com
Sunday, 18 December 2011
Another Card Tote in Progress...
Hi guys, hope you're all having a fab weekend - can you believe that it will be Christmas day this time next week! Today we got most of the last minute christmas shopping done now and busily finishing the handmade christmas gifts i'm making: christmas card totes. Here's one i have almost finished:
I brought the instructions to make this online from an Australian Stampin' Up! demo (just google card tote tutorials) I used the following materials to make this: 'Holly Berry Bouquet DSP', '1-3/8" Circle Punch', '1/2" Circle Punch' 'Crop-a-dile', 'Chocolate Chip' 'Grosgrain Ribbon', 'Early Espresso' 'Satin Ribbon', 'Early Espresso' card.
Here's a side view:
I lined the card tote with 'Whisper White' card, and the concertina and dividers are made from 'Cherry Cobbler' card! All i have left to do is attach a card label and then it will be ready to fill with handmade cards and give away to our grandparents for christmas!!
I brought the instructions to make this online from an Australian Stampin' Up! demo (just google card tote tutorials) I used the following materials to make this: 'Holly Berry Bouquet DSP', '1-3/8" Circle Punch', '1/2" Circle Punch' 'Crop-a-dile', 'Chocolate Chip' 'Grosgrain Ribbon', 'Early Espresso' 'Satin Ribbon', 'Early Espresso' card.
Here's a side view:
I lined the card tote with 'Whisper White' card, and the concertina and dividers are made from 'Cherry Cobbler' card! All i have left to do is attach a card label and then it will be ready to fill with handmade cards and give away to our grandparents for christmas!!
Sunday, 27 November 2011
Christmas Countdown: An advent Calender Project!
Hi all, i hope you are all having a fab weekend! Mine's been very crafty! Kim, a friend of mine texted me yesterday with a picture of a fantastic advent calender she had designed and made. As soon as saw it i knew i just HAD to make one for myself, so before the ladies arrived yesterday afternoon for some Christmas crafting i got to work, and here is the final result:
Started with a piece of 12x12 thick card, i pasted a piece of the 'Holly Berry Bouquet DSP' to create the backing. The 24 pockets were created from 8x8cm squares of 'Cherry Cobbler' and 'Pear Pizzazz' card clever folded and fixed in place using 'Red Sticky Tape'. I typed the numbers using my laptop - and printed them out onto a sheet of 'Whisper White' - i tried to match the font colour as best as i could to 'Cherry Cobbler' and then punched them out using the 1/2" Circle Punch':
I stuck each of the pockets to the background board using 'Red Sticky' tape! I finished off the project by gluing two '1/2" Circles' punched from 'Cherry Cobbler' card to the top of the advent calender, punched a hole through each one using my 'Crop-a-dile' (and i'm just waiting for my stampin' Up! order to arrive and then i will thread some scrummy 'Cherry cobbler' ribbon through the top!
That just leaves the most important bit - the chocoloate!! I finished it off with a little santa in each pocker (available from Morrisons - 16 for 99p!)
So have you got your advent calender yet? Why not make one like this you can use again and again!!! You can put any sort of choc you like into it!! Thanks Kim for the idea!!
Just before i go, as i mentioned earlier in my post, yesterday i had some lovely ladies around for some Christmas crafting!
We had a great time and everyone went away with a batch of Christmas cards!! Thankyou to everyone who attended. If you couldn't make it, it's not too late to get crafty this Christmas! Why not have a flick through the catalogue on the righthand side of this blog and email over an order: amyjtidd@gmail.com
I will be hosting more classes and open houses in the new year - so keep an eye on the blog!!!
Started with a piece of 12x12 thick card, i pasted a piece of the 'Holly Berry Bouquet DSP' to create the backing. The 24 pockets were created from 8x8cm squares of 'Cherry Cobbler' and 'Pear Pizzazz' card clever folded and fixed in place using 'Red Sticky Tape'. I typed the numbers using my laptop - and printed them out onto a sheet of 'Whisper White' - i tried to match the font colour as best as i could to 'Cherry Cobbler' and then punched them out using the 1/2" Circle Punch':
I stuck each of the pockets to the background board using 'Red Sticky' tape! I finished off the project by gluing two '1/2" Circles' punched from 'Cherry Cobbler' card to the top of the advent calender, punched a hole through each one using my 'Crop-a-dile' (and i'm just waiting for my stampin' Up! order to arrive and then i will thread some scrummy 'Cherry cobbler' ribbon through the top!
That just leaves the most important bit - the chocoloate!! I finished it off with a little santa in each pocker (available from Morrisons - 16 for 99p!)
So have you got your advent calender yet? Why not make one like this you can use again and again!!! You can put any sort of choc you like into it!! Thanks Kim for the idea!!
Just before i go, as i mentioned earlier in my post, yesterday i had some lovely ladies around for some Christmas crafting!
We had a great time and everyone went away with a batch of Christmas cards!! Thankyou to everyone who attended. If you couldn't make it, it's not too late to get crafty this Christmas! Why not have a flick through the catalogue on the righthand side of this blog and email over an order: amyjtidd@gmail.com
I will be hosting more classes and open houses in the new year - so keep an eye on the blog!!!
Friday, 25 November 2011
Just Believe Cards With Giftbox
Hi guys! It's Friday! So relieved and really looking forward to the weekend! I have lots of crafting in store!
Today i have a fab handmade gift idea to share with you - a lovely box full of handmade giftcards, using the lovely 'Just Believe' stampset:
Such a beautiful and versatile stampset i think you'll agree, and you can use it in some many ways - this project really showcases its versatility well:
The box is made from 'Crumb Cake' cardstock, and uses the '1/2" circle' Punch to create an opening device. (There's lots of templates online) The lid uses 'Rich Razzleberry DSP', 'Old Olive DSP' and 'Basic Rhinestones' to bling it up! The 'Some Things Have To Be Believed' sentiment was inked using 'Old Olive' and 'Rich Razzleberry' 'Stampin' Write Markers', and features a little loop of 'Whisper White' 'Satin Ribbon'. Here's a close up of the box:
And here's the cards that go inside:
What a fab colour combo this is! Jade (a fellow demonstrator) came up with wonderful project - don't you think it would be a lovely gift to send to someone over christmas. People are always having to buy cards, so why not make some for them - a perfect gift, especially for someone who finds it difficult to get out to the shops and buy cards for themselves!
It's not too late to get an order in to buy some crafty materials to make some gifts like these. The catalogue is on the righthand side of this blog. Make your list and email your order over: amyjtidd@gmail.com
Today i have a fab handmade gift idea to share with you - a lovely box full of handmade giftcards, using the lovely 'Just Believe' stampset:
Such a beautiful and versatile stampset i think you'll agree, and you can use it in some many ways - this project really showcases its versatility well:
The box is made from 'Crumb Cake' cardstock, and uses the '1/2" circle' Punch to create an opening device. (There's lots of templates online) The lid uses 'Rich Razzleberry DSP', 'Old Olive DSP' and 'Basic Rhinestones' to bling it up! The 'Some Things Have To Be Believed' sentiment was inked using 'Old Olive' and 'Rich Razzleberry' 'Stampin' Write Markers', and features a little loop of 'Whisper White' 'Satin Ribbon'. Here's a close up of the box:
And here's the cards that go inside:
What a fab colour combo this is! Jade (a fellow demonstrator) came up with wonderful project - don't you think it would be a lovely gift to send to someone over christmas. People are always having to buy cards, so why not make some for them - a perfect gift, especially for someone who finds it difficult to get out to the shops and buy cards for themselves!
It's not too late to get an order in to buy some crafty materials to make some gifts like these. The catalogue is on the righthand side of this blog. Make your list and email your order over: amyjtidd@gmail.com
Friday, 4 November 2011
More Punchart - a card for a pregnant lady!
Hiya to all my CraftyThINKers. Hope you are all ok, i'm sure you're relieved it is Friday! I'm still not well, so today i have another card that we made on our recent craft retreat to the Isle of Wight.
This card is a punchart card - that uses lots and lots of Stampin' Up! punches. This is not an original design - we printed off a fab tutorial from Bonnie Mountford's blog. Although we did change the colours and the layout slightly. So heres the card:
The card base and 'DSP' used is 'Tangerine Tango'. We used some 'Soft Suede' to compliment it and layer the pregnant woman. The woman has been made from some 'Tempting Turquoise', 'Basic Black', 'Pink Pirouette', 'Daffodil Delight' and 'Chocolate Chip'. Her bag was made from 'Melon Mambo' 'DSP'. I used the following punches:
The sentiment is from the retired 'Occassional Quotes' stampset - as that's what i had to hand - but there's plenty of sentiments you could use in the current catty! I finished it off with a bit of 'Pumpkin Pie' 'Grosgrain Ribbon'.
This card took forever because of all the componants!!! But i hope you will agree it's a fabby card! Ruth also had a go at making this card so here's our cards together:
Why not treat yourself to a few punches and have a go at some punchart?! Not all designs are as complicated as this one. Check back at some of my previous posts to see other punchart creations (see yesterdays post where i made a punchart christmas tree)
If you would like to make an order i'm offering free P&P (usually £4.95) on orders over £50 until the 7th November. Email over your order today: amyjtidd@gmail.com
This card is a punchart card - that uses lots and lots of Stampin' Up! punches. This is not an original design - we printed off a fab tutorial from Bonnie Mountford's blog. Although we did change the colours and the layout slightly. So heres the card:
The card base and 'DSP' used is 'Tangerine Tango'. We used some 'Soft Suede' to compliment it and layer the pregnant woman. The woman has been made from some 'Tempting Turquoise', 'Basic Black', 'Pink Pirouette', 'Daffodil Delight' and 'Chocolate Chip'. Her bag was made from 'Melon Mambo' 'DSP'. I used the following punches:
- '1-3/8" Circle'
- 'Large Oval'
- 'Modern Label Punch'
- 'Wide Oval'
- 'Small Heart'
- 'Ornament'
- 'Owl Punch'
- '1/2" Punch'
- 'Itty Bitty Punch'
- 'Boho Blossom'
- Round Tab Punch'
The sentiment is from the retired 'Occassional Quotes' stampset - as that's what i had to hand - but there's plenty of sentiments you could use in the current catty! I finished it off with a bit of 'Pumpkin Pie' 'Grosgrain Ribbon'.
This card took forever because of all the componants!!! But i hope you will agree it's a fabby card! Ruth also had a go at making this card so here's our cards together:
Why not treat yourself to a few punches and have a go at some punchart?! Not all designs are as complicated as this one. Check back at some of my previous posts to see other punchart creations (see yesterdays post where i made a punchart christmas tree)
If you would like to make an order i'm offering free P&P (usually £4.95) on orders over £50 until the 7th November. Email over your order today: amyjtidd@gmail.com
Monday, 31 October 2011
Crafty Boots Challenge: Young at Heart!
Yep, it's that time again - time for another Crafty Boots Challenge! This fortnight the challenge is 'Young at Heart' (this could be anything child related or even reminiscent of children, bright colours etc.) So here's my Design Team offering:
I have used a really fun stampset from Stampin' Up! called 'Something Sweet'. I started off with a 'Real Red' cardbase and layered some 'Daffodil Delight' 'DSP'. Next i got a piece of 'Pacific Point' cardstock and punched a '1-3/4" Circle' out of it. I also got a strip of 'Real Red' card and edged it using the 'Eyelet Border Punch' and glued them together.
I stamped the gumball machine and its lid (onto some 'Whisper White' card) using 'Tempting Turquoise' and 'Basic Grey' (using 'Stampin' Write Markers'). I carefully cut this image out and glued this on the 'Pacific Point Card either side of the punched hole. I then stamped out lots of gumballs in a selection of colours and punched them out using a '1/2" Circle Punch' and arranged them until i was happy with their position and glued them down. I then placed a 'Treat Cup' through the '1-3/8" Circle' before gluing down the 'Pacific Point Card!
Finally i stamped out the sentiment in 'Real Red' ink and punched it out using the 'Modern Label Punch'. I punched out two small holes using my 'Crop-a-dile' and then threaded some 'Real Red' 'Taffeta Ribbon', tucking it behind the 'DSP'.
A lovely bright birthday card, reminiscent of my childhood - i loved my gumball machine when i was a kid! I hope you like my creation! This stampset is fab and is so versatile - you can create so many wonderful cards with it! There are so many pieces to the set - take a look:
I'm always processing Stampin' Up! orders, so if you fancy placing an order drop me an email with your order: amyjtidd@gmail.com
I hope you find a moment to enter the challenge - i can't wait to see your creations!!
I have used a really fun stampset from Stampin' Up! called 'Something Sweet'. I started off with a 'Real Red' cardbase and layered some 'Daffodil Delight' 'DSP'. Next i got a piece of 'Pacific Point' cardstock and punched a '1-3/4" Circle' out of it. I also got a strip of 'Real Red' card and edged it using the 'Eyelet Border Punch' and glued them together.
I stamped the gumball machine and its lid (onto some 'Whisper White' card) using 'Tempting Turquoise' and 'Basic Grey' (using 'Stampin' Write Markers'). I carefully cut this image out and glued this on the 'Pacific Point Card either side of the punched hole. I then stamped out lots of gumballs in a selection of colours and punched them out using a '1/2" Circle Punch' and arranged them until i was happy with their position and glued them down. I then placed a 'Treat Cup' through the '1-3/8" Circle' before gluing down the 'Pacific Point Card!
Finally i stamped out the sentiment in 'Real Red' ink and punched it out using the 'Modern Label Punch'. I punched out two small holes using my 'Crop-a-dile' and then threaded some 'Real Red' 'Taffeta Ribbon', tucking it behind the 'DSP'.
A lovely bright birthday card, reminiscent of my childhood - i loved my gumball machine when i was a kid! I hope you like my creation! This stampset is fab and is so versatile - you can create so many wonderful cards with it! There are so many pieces to the set - take a look:
I'm always processing Stampin' Up! orders, so if you fancy placing an order drop me an email with your order: amyjtidd@gmail.com
I hope you find a moment to enter the challenge - i can't wait to see your creations!!
Sunday, 30 October 2011
Giraffe Punch-Art Card!
Today i have a card to share with you that i have made with all my Stampin' Up! punches!! I just love punch-art! There are obvious uses for the punches, but it is always very nice to come up with a new way to use them! Sometimes if you stare at the punches for long enough you see another use for them in this instance i saw the possibility of using the 'Round Tab Punch' to create a giraffe!! Here it is:
I made the head from the 'Round Tab Punch' from some 'Daffodil Delight' card, i also punched another 'Round Tab' from some 'Early Espresso' card, cut to a third. I made his nostrils using my 'Crop-a-dile' and also made his eyes using the same method. His ears have been made from a '5 Petal Flower' and i trimmed another 'Early Espresso' one to make the inners of his ears. His neck has been made from a strip of 'Daffodil Delight' card, and his body from a square of 'Daffodil Delight' rounded off on one corner using a 'Corner Rounder'. I made his spots from 'Early Espresso' card punched out using the '1/2" Circle Punch'. The branch was punched from some 'Garden Green' cardstock using the 'Two-step Bird Punch'. I arranged all the components onto some 'Certainly Celery' card, mounted it onto 'Soft Suede' card and then placed it all onto an 'Early Espresso' cardbase!
Why not get your punches out and have a play! You can pretty much make anything you want from them if you have the imagination!!! Why not take a look at the Stampin' Up! punch range (pages 116 - 119 of the catalogue!)
I made the head from the 'Round Tab Punch' from some 'Daffodil Delight' card, i also punched another 'Round Tab' from some 'Early Espresso' card, cut to a third. I made his nostrils using my 'Crop-a-dile' and also made his eyes using the same method. His ears have been made from a '5 Petal Flower' and i trimmed another 'Early Espresso' one to make the inners of his ears. His neck has been made from a strip of 'Daffodil Delight' card, and his body from a square of 'Daffodil Delight' rounded off on one corner using a 'Corner Rounder'. I made his spots from 'Early Espresso' card punched out using the '1/2" Circle Punch'. The branch was punched from some 'Garden Green' cardstock using the 'Two-step Bird Punch'. I arranged all the components onto some 'Certainly Celery' card, mounted it onto 'Soft Suede' card and then placed it all onto an 'Early Espresso' cardbase!
Why not get your punches out and have a play! You can pretty much make anything you want from them if you have the imagination!!! Why not take a look at the Stampin' Up! punch range (pages 116 - 119 of the catalogue!)
Thursday, 20 October 2011
Top Note Dog GiftCard Holder
Another 'Top Note Die' project for you all today! I've been thinking about christmas quite a lot recently and we often give people giftcards but i think they can be quite impersonal gifts, so wanted to start thinking of some imaginative ways of giving these to people. Playing aroung with the 'Top Note Die' i came up with idea:
To create this dog you need to run some 'Soft Suede' cardstock through the 'Big Shot' using the 'Top Note Die'. You need two 'Top Notes' to make this project. His eyes were made from two '1-3/8" Circles' punched from 'Very Vanilla' card, two '1/2" Circles' of 'Soft Suede' and then two smaller circles made from 'Basic Black' card, using the 'Owl Punch'. His muzzle was made using the 'Round Tab Punch' from some 'Very Vanilla' card. his nose was made from some 'Basic Black' card using the 'Heart to Heart' Punch, his tongue was created from some 'Blushing Bride' card using the 'Heart Punch'. His ears were created from a 'Top Note' chopped in half and then glued in place!!
Now, you're wondering how this can hold a gift card, well here you go:
Simply run one more piece of 'Soft Suede' card through the 'big Shot' to create another 'Top Note', chop it in half and then run some 'Red Sticky Tape' along three sides of it to create a pocket.
This giftcard holder can fit sniggly into a 6"x6" envelope and definately personalises a simple gift card!! Hope you like the idea! You could of course create this dog in different colours, or create a different character althogether with a little bit of imagination! Why not treat yourself to the 'Top Note Die', email over your order today: amyjtidd@gmail.com
To create this dog you need to run some 'Soft Suede' cardstock through the 'Big Shot' using the 'Top Note Die'. You need two 'Top Notes' to make this project. His eyes were made from two '1-3/8" Circles' punched from 'Very Vanilla' card, two '1/2" Circles' of 'Soft Suede' and then two smaller circles made from 'Basic Black' card, using the 'Owl Punch'. His muzzle was made using the 'Round Tab Punch' from some 'Very Vanilla' card. his nose was made from some 'Basic Black' card using the 'Heart to Heart' Punch, his tongue was created from some 'Blushing Bride' card using the 'Heart Punch'. His ears were created from a 'Top Note' chopped in half and then glued in place!!
Now, you're wondering how this can hold a gift card, well here you go:
Simply run one more piece of 'Soft Suede' card through the 'big Shot' to create another 'Top Note', chop it in half and then run some 'Red Sticky Tape' along three sides of it to create a pocket.
This giftcard holder can fit sniggly into a 6"x6" envelope and definately personalises a simple gift card!! Hope you like the idea! You could of course create this dog in different colours, or create a different character althogether with a little bit of imagination! Why not treat yourself to the 'Top Note Die', email over your order today: amyjtidd@gmail.com
Monday, 17 October 2011
Crafty Boots Challenge: Autumn/ Halloween
Hi everyone, it's that time again - the launch of a new Crafty Boots Challenge and this fortnight it is 'Autumn/ Halloween', so get you creative thinking caps on, come up with a design and enter!!
I have loved creating halloween products and sharing them with you all over the last week or so and so i offered them to Crafty Boots Challenge as my DT contribution this week.
In case you have been neglecting my Crafty ThINKer blog here's the collection of halloween offerings that i have been making:
All of these projects have been featured on my blog over the last week. To get details on how to create each of these, please click on the links below:
Don't forget to get your Craft Boots Challenge entry in! Look forward to seeing them all!
I have loved creating halloween products and sharing them with you all over the last week or so and so i offered them to Crafty Boots Challenge as my DT contribution this week.
In case you have been neglecting my Crafty ThINKer blog here's the collection of halloween offerings that i have been making:
All of these projects have been featured on my blog over the last week. To get details on how to create each of these, please click on the links below:
- Pumpkin Card
- Frankenstein Card
- Mummy Card
- Owl Trick or Treat
- Count Dracula Card
- Bat Trick or Treat Pillow Box
Don't forget to get your Craft Boots Challenge entry in! Look forward to seeing them all!
Saturday, 15 October 2011
Count Dracula!
Another halloween special for you today! Again it uses the 'Top Note Die'. Using a similar technique to when i created the mummy and the frankenstein card! So today i have a Count Dracula card to share with you:
His face has been made from the new 'In Colour' 'Wisteria Wonder', which i created by running the card through the 'Big Shot' using the 'Top Note Die'. ('Sponge Daubed' with some 'Soft Suede' ink) His hair has been formed from a 'Basic Black' 'Top Note' which i chopped to just less than half, and then i punched two semi circles out of it using the '1-3/4" Circle Punch'. His eyes have been created from two 'Whisper White' '1-3/8" Circles', which i 'Sponge Daubed' with a little bit of 'Real Red' ink, his pupils have been made from two 'Basic Black' '1/2" Circles', and his eyelids from one '1-3/8" Circle chopped in half, 'Sponge Daubed' with 'Soft Suede' ink and then raised with some 'Dimensionals'. His nose has been created from from the 'Round Tab Punch', again 'Sponge Daubed' with 'Soft Suede' ink. His mouth has been hand drawn with a 'Basic Black' 'Stampin' Write Marker', using the edge of a 'Top Note' as a template. I hand-snipped his fangs from some 'Whisper White' card, and rubbed a little bit of 'Real Red' on the edges to create some blood!!
His body has been made from the other part of the 'Basic Black' 'Top note'. I used some 'Whisper White' card to create his shirt and then some 'Real Red' 'Satin Ribbon' to create his tie. I arranged all of this onto a 'Concord Crush' cardbase!!
Hope you like the halloween makes - i have one more to share with you tomorrow - an idea of a treat you can give to your trick or treaters!
His face has been made from the new 'In Colour' 'Wisteria Wonder', which i created by running the card through the 'Big Shot' using the 'Top Note Die'. ('Sponge Daubed' with some 'Soft Suede' ink) His hair has been formed from a 'Basic Black' 'Top Note' which i chopped to just less than half, and then i punched two semi circles out of it using the '1-3/4" Circle Punch'. His eyes have been created from two 'Whisper White' '1-3/8" Circles', which i 'Sponge Daubed' with a little bit of 'Real Red' ink, his pupils have been made from two 'Basic Black' '1/2" Circles', and his eyelids from one '1-3/8" Circle chopped in half, 'Sponge Daubed' with 'Soft Suede' ink and then raised with some 'Dimensionals'. His nose has been created from from the 'Round Tab Punch', again 'Sponge Daubed' with 'Soft Suede' ink. His mouth has been hand drawn with a 'Basic Black' 'Stampin' Write Marker', using the edge of a 'Top Note' as a template. I hand-snipped his fangs from some 'Whisper White' card, and rubbed a little bit of 'Real Red' on the edges to create some blood!!
His body has been made from the other part of the 'Basic Black' 'Top note'. I used some 'Whisper White' card to create his shirt and then some 'Real Red' 'Satin Ribbon' to create his tie. I arranged all of this onto a 'Concord Crush' cardbase!!
Hope you like the halloween makes - i have one more to share with you tomorrow - an idea of a treat you can give to your trick or treaters!
Friday, 14 October 2011
Trick or Treat?!
I'm having a bit of a halloween fest on CraftyThINKer this week! I've started this about the 31st and all those cute kids dressed up in spooky costumes. This year i have decided to make my own trick or treat gifts! I just love owls and again this project uses the 'Top Note Die':
I ran some 'Soft Suede' cardstock through the 'Big Shot' using the 'Top Note Die' to create a topper for the 'Cello Bags'. I folded the 'Top Note' in half, punched out two 'Whisper White' '1-3/8" Circles' for the eyes. I used 2 'Basic Black' '1/2" Circles' to create his pupils, and a 'Soft Suede' '1-3/8" Circle' cut in half to create his eyelids and i raised these using 'Dimensionals'. The owls beak is made from 'Pumpkin Pie' card which i have punched using the '5 Petal Flower Punch'. I used one single petal from the punched flower to create his beak! I filled up a 'Cellophane Bag' with yummy sweets and then stuck it all in place using some 'Red Sticky Strip'.
There you go, a very simple AND cheap trick or treat gift!!!
I just love the 'Top Note Die' as it is so versatile!! It's not too late to get an order in. I'm putting through an order on the 22nd October and i can offer you free P&P! Get your order in today!!!
I ran some 'Soft Suede' cardstock through the 'Big Shot' using the 'Top Note Die' to create a topper for the 'Cello Bags'. I folded the 'Top Note' in half, punched out two 'Whisper White' '1-3/8" Circles' for the eyes. I used 2 'Basic Black' '1/2" Circles' to create his pupils, and a 'Soft Suede' '1-3/8" Circle' cut in half to create his eyelids and i raised these using 'Dimensionals'. The owls beak is made from 'Pumpkin Pie' card which i have punched using the '5 Petal Flower Punch'. I used one single petal from the punched flower to create his beak! I filled up a 'Cellophane Bag' with yummy sweets and then stuck it all in place using some 'Red Sticky Strip'.
There you go, a very simple AND cheap trick or treat gift!!!
I just love the 'Top Note Die' as it is so versatile!! It's not too late to get an order in. I'm putting through an order on the 22nd October and i can offer you free P&P! Get your order in today!!!
Wednesday, 12 October 2011
Another Spooky Make!
Hi all, today i have another spooky halloween card to share with and yes, it uses my beloved 'Top Note Die', today i have a Frankenstein card for you:
I made this spooky guys head from 'Old Olive' cardstock ran through the 'Big Shot' uses the 'Top Note Die. His neck is also made from some 'Old Olive card. I 'Sponge Daubed' around the 'Top Note' with some 'Old Olive' ink. His hair had been made from a 'Concord Crush' 'Top Note' which i have shaped using my 'Paper Snips'. His eyes have been made from two punched '1-3/8" Circles' from 'Whisper White' and then to make his eyelids i chopped in half one 'Old Olive' '1-3/8 Circle'. His pupils have been made from '1/2" Circles' in 'Basic Black'. His nose have been made from a 'Round Tab Punch' (which has also been 'Sponge Daubed'. I've drawn on some scars with a 'Basic Black' 'Stampin' Write Marker'. The bolts on his neck have been created from some 'Basic Grey' card that i have snipped into shape by hand. I drew the detail from a 'Basic Grey' 'Stampin' Write Marker'. I glued all the components together and then raised his head using some 'dimensionals'. All of this has been placed onto a 'Pumpkin Pie' cardbase (again 'Sponge Daubed' with some 'Old Olive' ink.)
I'm entering this make into the 'Cupcake Craft Challenge' which this week is 'halloween'. Hope everyone at cupcake likes it!!
I made this spooky guys head from 'Old Olive' cardstock ran through the 'Big Shot' uses the 'Top Note Die. His neck is also made from some 'Old Olive card. I 'Sponge Daubed' around the 'Top Note' with some 'Old Olive' ink. His hair had been made from a 'Concord Crush' 'Top Note' which i have shaped using my 'Paper Snips'. His eyes have been made from two punched '1-3/8" Circles' from 'Whisper White' and then to make his eyelids i chopped in half one 'Old Olive' '1-3/8 Circle'. His pupils have been made from '1/2" Circles' in 'Basic Black'. His nose have been made from a 'Round Tab Punch' (which has also been 'Sponge Daubed'. I've drawn on some scars with a 'Basic Black' 'Stampin' Write Marker'. The bolts on his neck have been created from some 'Basic Grey' card that i have snipped into shape by hand. I drew the detail from a 'Basic Grey' 'Stampin' Write Marker'. I glued all the components together and then raised his head using some 'dimensionals'. All of this has been placed onto a 'Pumpkin Pie' cardbase (again 'Sponge Daubed' with some 'Old Olive' ink.)
I'm entering this make into the 'Cupcake Craft Challenge' which this week is 'halloween'. Hope everyone at cupcake likes it!!
Monday, 3 October 2011
Crafty Boots Challenge: Zoo!
Yep! It's that time again - the launch of another Crafty Boots Challenge! This fortnight their is a Zoo theme to challenge your creativity!! Here is my design team entry to inspire you, using Stampin' Up! products of course!!!
I totally love 'Punch-Art' creations and created this lovely lion using my collection of Stampin' Up! punches, cardstock and my paper snips, and a sentiment from the (sadly retired) 'Fun and Fast Notes'.
The lion has been created from some 'Peach Parfait' and 'Chocolate Chip' cardstock. The lions head was created from a '1-3/8" Circle', his muzzle was created from two '1/2" Circles' (which i speckled with dots created with my 'Chocolate Chip' 'Stampin' Write Marker'), his nose is created from a small heart punched from the 'Owl Punch', his ears from the '5 Petal Flower Punch', his mane from the 'Scallop Circle Punch', his body from a '1-3/4" Circle', his tail was snipped from a '1-1/4" Circle' and the end of his tail was created from a small flower from the 'Boho Blossom Punch'.
The grass was created from a strip of 'Old Olive' and a strip of 'Pear Pizzazz' which i have snipped over and over again using my paper snips. The tree trunk was created from some 'Early Espresso' card which i snipped into shape by hand, and i punched out the branches from green cardstock, using the 'Two-Step Bird Punch' .
I stamped the sentiment (from 'Fun and Fast Notes' onto some 'Whisper White' cardstock, punched it out using the 'Decorative Label Punch' and cut it in half!
I layered it all up onto a 'Bashful Blue' cardbase!!! So please with this card and it reminds me of my Tanzania trip back in July!! I'm definately planning on creating some more African inspired punch-art cards, so watch this space!!
If you like the products featured on this blog then why not make an order, i accept all UK orders, and often have exclusive special deals for all my customers! A Stampin' Up! catalogue can be found on the right-hand side of this blog. If you have any questions, or would like to place an order then just email me: amyjtidd@gmail.com
Look forward to seeing everyones Zoo themed Crafty Boot Challenge entries!! Good Luck!
I totally love 'Punch-Art' creations and created this lovely lion using my collection of Stampin' Up! punches, cardstock and my paper snips, and a sentiment from the (sadly retired) 'Fun and Fast Notes'.
The lion has been created from some 'Peach Parfait' and 'Chocolate Chip' cardstock. The lions head was created from a '1-3/8" Circle', his muzzle was created from two '1/2" Circles' (which i speckled with dots created with my 'Chocolate Chip' 'Stampin' Write Marker'), his nose is created from a small heart punched from the 'Owl Punch', his ears from the '5 Petal Flower Punch', his mane from the 'Scallop Circle Punch', his body from a '1-3/4" Circle', his tail was snipped from a '1-1/4" Circle' and the end of his tail was created from a small flower from the 'Boho Blossom Punch'.
The grass was created from a strip of 'Old Olive' and a strip of 'Pear Pizzazz' which i have snipped over and over again using my paper snips. The tree trunk was created from some 'Early Espresso' card which i snipped into shape by hand, and i punched out the branches from green cardstock, using the 'Two-Step Bird Punch' .
I stamped the sentiment (from 'Fun and Fast Notes' onto some 'Whisper White' cardstock, punched it out using the 'Decorative Label Punch' and cut it in half!
I layered it all up onto a 'Bashful Blue' cardbase!!! So please with this card and it reminds me of my Tanzania trip back in July!! I'm definately planning on creating some more African inspired punch-art cards, so watch this space!!
If you like the products featured on this blog then why not make an order, i accept all UK orders, and often have exclusive special deals for all my customers! A Stampin' Up! catalogue can be found on the right-hand side of this blog. If you have any questions, or would like to place an order then just email me: amyjtidd@gmail.com
Look forward to seeing everyones Zoo themed Crafty Boot Challenge entries!! Good Luck!
Sunday, 2 October 2011
Welcome 2011-12 In Colours!!
Today i would like to introduce to you the new Stampin' Up! 'In Colours'. Stampin' Up! have their core colour collections and then every year they introduce five colours that will remain in the catalogue for two years. So here are the five 2011-12 'In colours' and i'm sure you will agree they are stunning!!
For the next two years you can buy Cardstock, Inkpads, 'Stampin' Write Markers', 'DSP', 'Ribbons' and 'Brads' in the 2011-12 'In colors'. You can find all these products on Page 90 of the new catalogue!!
So i thought i'd share with you a card i have made using these lovely new colours:
I started with a 'Lucky Limeade' cardbase. I then ran 'Calypso Coral', 'Island Indigo', 'Pool Party' and 'Wisteria Wonder' cardstock through the 'Big Shot' using the 'Top Note Die'. I then punched four '5 Petal Flowers' and four '1/2" Circles' out of the same card and arranged them on the 'Top Note'. A clean and simple card showcasing these beautiful colours!!!
For the next two years you can buy Cardstock, Inkpads, 'Stampin' Write Markers', 'DSP', 'Ribbons' and 'Brads' in the 2011-12 'In colors'. You can find all these products on Page 90 of the new catalogue!!
So i thought i'd share with you a card i have made using these lovely new colours:
I started with a 'Lucky Limeade' cardbase. I then ran 'Calypso Coral', 'Island Indigo', 'Pool Party' and 'Wisteria Wonder' cardstock through the 'Big Shot' using the 'Top Note Die'. I then punched four '5 Petal Flowers' and four '1/2" Circles' out of the same card and arranged them on the 'Top Note'. A clean and simple card showcasing these beautiful colours!!!
Wednesday, 28 September 2011
If you go down to the woods today...
Here's my entry to this weeks Cupcake Craft Challenge. The theme this week is 'If you go down to the woods today...' and basically you have to create a card featuring a teddybear!
My friend Ruth is completely into punch-art (cards created using paper punches) and she has got me hooked aswell! I saw a version of this cute teddybear on Julies website (i had to vary it a little bit because i didn't have a couple of the punches she used) but i'm still very pleased with the final result!
This cute little bear has been made from 'Soft Suede' cardstock. His body has been made from the '1-3/4" Circle Punch', his head from the '1-3/8" punch, his arms from the 'Heart Punch' with i have cut in half and then rounded off the round edge of the heart with the 'Corner Rounder' to make them thinner. His feet are made from a '1/2" Circle Punch' and i have used the '1/4" Circle punch to create his ears and his paws (from Pretty in Pink cardstock). His inner ears have been made using the 'Owl Punch' (the little circles that usually create the owls eyes) I also used the small heart from the 'Owl Punch' to create the bears nose. Before constructing the bear i used a 'Sponge Dauber' with some 'Soft Suede' ink to give some texture.
I placed the bear on some 'DSP' from the (soon retiring) 'Nursery Suite' collection and mounted it onto a 'Pretty in Pink' cardbase.
I popped a 'Welcome Baby' sentiment (from the 'Something to Celebrate' stampset) inside the card. Cute hey?! I'm a bit addicted to punch-art now - so keep checking back on this blog to see more!!!
My friend Ruth is completely into punch-art (cards created using paper punches) and she has got me hooked aswell! I saw a version of this cute teddybear on Julies website (i had to vary it a little bit because i didn't have a couple of the punches she used) but i'm still very pleased with the final result!
This cute little bear has been made from 'Soft Suede' cardstock. His body has been made from the '1-3/4" Circle Punch', his head from the '1-3/8" punch, his arms from the 'Heart Punch' with i have cut in half and then rounded off the round edge of the heart with the 'Corner Rounder' to make them thinner. His feet are made from a '1/2" Circle Punch' and i have used the '1/4" Circle punch to create his ears and his paws (from Pretty in Pink cardstock). His inner ears have been made using the 'Owl Punch' (the little circles that usually create the owls eyes) I also used the small heart from the 'Owl Punch' to create the bears nose. Before constructing the bear i used a 'Sponge Dauber' with some 'Soft Suede' ink to give some texture.
I placed the bear on some 'DSP' from the (soon retiring) 'Nursery Suite' collection and mounted it onto a 'Pretty in Pink' cardbase.
I popped a 'Welcome Baby' sentiment (from the 'Something to Celebrate' stampset) inside the card. Cute hey?! I'm a bit addicted to punch-art now - so keep checking back on this blog to see more!!!
Subscribe to:
Posts (Atom)