This fab Christmas card was created by Daneila (a fellow demo at a recent swap event)
The cardbase is 'Confetti White' card. She then glued a strip of 'In Colour DSP' down the centre with the 'Ornament Punch' cut out.
She then punched out a separate ornament shape and using a '2-way Glue Pen' applied 'Dazzling Diamond Glitter' polkadots.
Finally the sentiment is from the 'For My Family' stampset inked in 'Chocolate Chip'.
I love the simplicity of this card. It would be a perfect desogn to consider if you was planning on making a big batch of cards! If you'd like to order some Stampin Up products drop me an email: amyjtidd@gmail.com
Amy Tidd - Independent Stampin' Up! demonstrator. Operating in the Surrey/ Hampshire area.
Showing posts with label Dazzling Diamond Glitter. Show all posts
Tuesday, 6 November 2012
Monday, 5 March 2012
Crafty Boots Challenge: All that Glitters!!
It's that time again - time for another Crafty Boots Challenge and this fortnight the theme is All That Glitters! We want to see all your glittery sparkly craft projects!!
So today i have my DT project to share with you ... a card i made for my friend Kim. It was her hen do this weekend just gone. I opted not to go due to my pregnancy but i wanted her to know that i was thinking of her and wishing her lots of fun so i sent her this card:
This cardbase is 'Melon Mambo', on which i layered some of the 'Cheerful Treat DSP'. I cut a square of 'Melon Mambo' card and ran some 'Red Sticky Strip' around each of the edges and then sprinkled some 'Dazzling Diamonds Glitter' to create a glitter border! Here's a close up:
I then placed a square of 'Whisper White' card in the centre and cut an 'L shape' from some more 'DSP' and glued it into the centre! Finally i placed three 'Basic Pearls' in a line in the bottom righthand corner of the card! I hope Kim had a fab hen do. Next milestone - the wedding! Roll on April!
Don't forget to enter your glittery projects into the Crafty Boots Challenge!
Hope you all have a good week. (Mine hasn't started very well - i'm ill :( So at home resting today.. Fingers crossed i'll feel better soon as i have so much to do in the next couple of weeks.)
So today i have my DT project to share with you ... a card i made for my friend Kim. It was her hen do this weekend just gone. I opted not to go due to my pregnancy but i wanted her to know that i was thinking of her and wishing her lots of fun so i sent her this card:
This cardbase is 'Melon Mambo', on which i layered some of the 'Cheerful Treat DSP'. I cut a square of 'Melon Mambo' card and ran some 'Red Sticky Strip' around each of the edges and then sprinkled some 'Dazzling Diamonds Glitter' to create a glitter border! Here's a close up:
Don't forget to enter your glittery projects into the Crafty Boots Challenge!
Hope you all have a good week. (Mine hasn't started very well - i'm ill :( So at home resting today.. Fingers crossed i'll feel better soon as i have so much to do in the next couple of weeks.)
Sunday, 12 February 2012
Outlined Occasions Valentine Card
Have you made your Valentine card yet?! If not then you really don't have long to get crafting!! Today i have a valentine card to share with you using the fab 'Sale-a-bration' stampset: 'Outlined Occasions' - maybe this card will give you some inspiration:
This card has all my favourite crafty elements - 'DSP', 'Punches', 'Stamping', 'Blender Pens' and 'Glitter'!!! Woo hoo! i love a bit of glitter!!!
So this card began like as a 'Basic Grey' cardbase. I layered a strip of 'Basic Grey' 'DSP' along the spine of the card. Next on a seperate piece of 'Whisper White' i stamped the 'Love' and 'be mine' sentiments using 'Basic Black' ink on the centre of the card. I coloured in the 'love' using 'Rose Red' ink and a 'Blender Pen'. Next i stamped 18 hearts out using the 'Small Heart Punch' from 'Real Red', 'Rose Red' and 'Pretty In Pink' card and glued them in place. Next i ran some 'Red Sticky Strip' down a small strip of 'Pretty In Pink' card and sprinkled over some 'Dazzling Diamond Glitter' and then put the card together!! I just love this card design so much!!
So get your craft stash out and make a card for the one you love!!! I have one more valentines card to share with you before the day - the card i'm giving to my hubby. (I made it at Jades crafty coffee morning and it features the fab 'Owl Punch' so make sure you keep visiting back to the Crafty ThINKer blog so you don't miss it!!!)
Don't forget you can place an order anytime, the easiest way is via email: amyjtidd@gmail.com and don't forget for every £45 you spend you get a 'Sale-a-bration' stampset or pack of papers for FREE!!!
This card has all my favourite crafty elements - 'DSP', 'Punches', 'Stamping', 'Blender Pens' and 'Glitter'!!! Woo hoo! i love a bit of glitter!!!
So this card began like as a 'Basic Grey' cardbase. I layered a strip of 'Basic Grey' 'DSP' along the spine of the card. Next on a seperate piece of 'Whisper White' i stamped the 'Love' and 'be mine' sentiments using 'Basic Black' ink on the centre of the card. I coloured in the 'love' using 'Rose Red' ink and a 'Blender Pen'. Next i stamped 18 hearts out using the 'Small Heart Punch' from 'Real Red', 'Rose Red' and 'Pretty In Pink' card and glued them in place. Next i ran some 'Red Sticky Strip' down a small strip of 'Pretty In Pink' card and sprinkled over some 'Dazzling Diamond Glitter' and then put the card together!! I just love this card design so much!!
So get your craft stash out and make a card for the one you love!!! I have one more valentines card to share with you before the day - the card i'm giving to my hubby. (I made it at Jades crafty coffee morning and it features the fab 'Owl Punch' so make sure you keep visiting back to the Crafty ThINKer blog so you don't miss it!!!)
Don't forget you can place an order anytime, the easiest way is via email: amyjtidd@gmail.com and don't forget for every £45 you spend you get a 'Sale-a-bration' stampset or pack of papers for FREE!!!
Saturday, 28 January 2012
Mini Catalogue and Sale-A-Bration Coffee Morning: 28th January
Hi all!! What a lovely day i have had!! This morning i hosted my crafty coffee morning in celebration of the new spring catalogue and the sale-a-bration promotion! It was completely hectic but totally enjoyable!! I'd like to thanks the following lovely ladies for attending:
Jade, Suzanne, Audrey, Lucy, Jamie, Kirsty, Katie, Cate, Charmaine, Susan, Claire, Ruth, Poppy and Laura
As well as some lovely people who sadly couldn't be there but made orders:
Jane, Stephanie-Emma and Hannah.
It was a lovely morning involving tea, coffee, chocolates and of course CRAFTING!! Most of the ladies are experienced crafters and so adapted the fairly simple make and take project and made it their own!!
So here is the original card - designed by the wonderfully talented Jade (as i have been super busy with being lazy and pregnant!!) Don't know what i would do without Jade she has been AMAZING!! Thankyou! :
The card is a 'Whisper White' cardbase, with a strip of 'DSP' running down the middle - handsnipped to create a snakes tongue style flag. The cupcake componants were stamped using the 'Create a Cupcake' stampset using 'Rose Red' and 'Wild Wasabi' (for the cherry) 'So Saffron' (for the icing) and 'Pool Party' for the cupcake case) These were then punched out using the 'Cupcake Punch' and stuck down using 'Dimensionals' to create a 3D effect. The sentiment is also from the 'Create a Cupcake' stampset, inked in 'Pool Party' and then punched out using the 'Word Window Punch'. Finally Jade placed three' Basic Rhinestones' down the righthand bottom corner!! Such a fab card - and with a change of sentiment would suit plenty of alternative occassions!!
And here are a few pics taken from today's event:
First up Kirsty and her take on the project - a lovely valentines card:
For this design she used a 'Whisper White' base, ran a strip of 'Melon Mambo' 'DSP' across the card. The valentine sentiment is from the 'Teeny Tiny Wishes' stampset and punched out using the 'Word Window Punch' with a couple of 'Basic Pearls' each side. Above she created a cupcake using the 'Create a Cupcake' stampset and the 'Cupcake Punch' and i love the way she has used the 'Two Way Glue Pen' and applied lots of 'Dazzling Diamond Glitter' to her design!!!
Next up is Ruthie!!:
Ruth kept the design suite close to the original adding of course a little extra bling!! She changed the sentiment at the bottom of her card to alternative one from the 'Create a Cupcake' stampset and then using 'Stampin' Write Markers' she stamped a candle either side of the sentiment - and most impressively she did this WITHOUT a 'Stamp-a-ma-jig'!!!
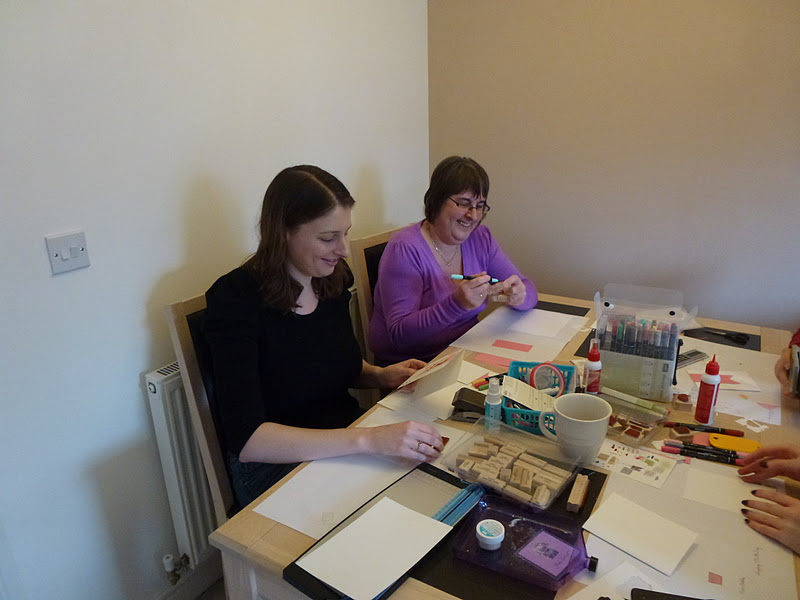
And heres a couple of pics of the lovely ladies getting a crafty and making the make and take project:
And the crafting also spilled to other parts of the living room with 'Big Shot' demos:
Finally i have to share with you Suzanne and Lucy's creations - both relatively new to crafting you wouldn't know it:
On the left is Lucy's creation - i just love the extra sprinkle detail she has added with the stamp from the set and the glitter she has applied to the cupcake icing and around the edge of the 'Word Window'!! and that cherry in the corner of the card is so cute!! And to the right is Suz's card - similar to the original but totally glitterflied!! Love, love, love!!
Thankyou once again to everyone who attended, crafted and made orders!! Hopefully your new products will be with you ASAP so you can get creating!! I know several of you are keen to get your crafty mits on your FREE sale-a-bration sets!!
If you couldn't make it today it is not too late to make an order to recieve a free sale-a-bration goody of your own! Email your order today: amyjtidd@gmail.com
Jade, Suzanne, Audrey, Lucy, Jamie, Kirsty, Katie, Cate, Charmaine, Susan, Claire, Ruth, Poppy and Laura
As well as some lovely people who sadly couldn't be there but made orders:
Jane, Stephanie-Emma and Hannah.
It was a lovely morning involving tea, coffee, chocolates and of course CRAFTING!! Most of the ladies are experienced crafters and so adapted the fairly simple make and take project and made it their own!!
So here is the original card - designed by the wonderfully talented Jade (as i have been super busy with being lazy and pregnant!!) Don't know what i would do without Jade she has been AMAZING!! Thankyou! :
The card is a 'Whisper White' cardbase, with a strip of 'DSP' running down the middle - handsnipped to create a snakes tongue style flag. The cupcake componants were stamped using the 'Create a Cupcake' stampset using 'Rose Red' and 'Wild Wasabi' (for the cherry) 'So Saffron' (for the icing) and 'Pool Party' for the cupcake case) These were then punched out using the 'Cupcake Punch' and stuck down using 'Dimensionals' to create a 3D effect. The sentiment is also from the 'Create a Cupcake' stampset, inked in 'Pool Party' and then punched out using the 'Word Window Punch'. Finally Jade placed three' Basic Rhinestones' down the righthand bottom corner!! Such a fab card - and with a change of sentiment would suit plenty of alternative occassions!!
And here are a few pics taken from today's event:
First up Kirsty and her take on the project - a lovely valentines card:
For this design she used a 'Whisper White' base, ran a strip of 'Melon Mambo' 'DSP' across the card. The valentine sentiment is from the 'Teeny Tiny Wishes' stampset and punched out using the 'Word Window Punch' with a couple of 'Basic Pearls' each side. Above she created a cupcake using the 'Create a Cupcake' stampset and the 'Cupcake Punch' and i love the way she has used the 'Two Way Glue Pen' and applied lots of 'Dazzling Diamond Glitter' to her design!!!
Next up is Ruthie!!:
Ruth kept the design suite close to the original adding of course a little extra bling!! She changed the sentiment at the bottom of her card to alternative one from the 'Create a Cupcake' stampset and then using 'Stampin' Write Markers' she stamped a candle either side of the sentiment - and most impressively she did this WITHOUT a 'Stamp-a-ma-jig'!!!
And heres a couple of pics of the lovely ladies getting a crafty and making the make and take project:
And the crafting also spilled to other parts of the living room with 'Big Shot' demos:
Finally i have to share with you Suzanne and Lucy's creations - both relatively new to crafting you wouldn't know it:
On the left is Lucy's creation - i just love the extra sprinkle detail she has added with the stamp from the set and the glitter she has applied to the cupcake icing and around the edge of the 'Word Window'!! and that cherry in the corner of the card is so cute!! And to the right is Suz's card - similar to the original but totally glitterflied!! Love, love, love!!
Thankyou once again to everyone who attended, crafted and made orders!! Hopefully your new products will be with you ASAP so you can get creating!! I know several of you are keen to get your crafty mits on your FREE sale-a-bration sets!!
If you couldn't make it today it is not too late to make an order to recieve a free sale-a-bration goody of your own! Email your order today: amyjtidd@gmail.com
Thursday, 6 October 2011
Another New Catty Delight: Beautiful Season
Hi everyone, sorry for such a delayed post tonight - got home for work and had a stonking headache, so had to have a little nap before writing up the post today.
Hope you have had a good Thursday, today i have another card to share with you that uses lots of lovely products from the new Stampin' Up! catalogue! This card was designed by another member of the 'Blue Angel Team' and i made it at her recent catalogue kick off party! It features the beautiful new christmas stampset: Beautiful Season:
Here is the card:
Hope you have had a good Thursday, today i have another card to share with you that uses lots of lovely products from the new Stampin' Up! catalogue! This card was designed by another member of the 'Blue Angel Team' and i made it at her recent catalogue kick off party! It features the beautiful new christmas stampset: Beautiful Season:
Here is the card:
The cardbase here is 'Always Artichoke', we ran through some 'Cherry Cobbler' card through the 'Big Shot' using the 'Vintage Wallpaper Embossing Folder' and ran some 'Twill Tape' along the middle.
Next we stamped the beautiful bird and holly image from the 'Beautiful Season' stampset onto some 'Very Vanilla', ran it through the 'Big Shot' using the 'Top Note Die'. We coloured the image in using 'Soft Suede', 'Always Artichoke' and 'Cherry Cobbler' ink and 'Blender Pens'. We also added some 'Dazzling Diamond Glitter' to give it an extra christmassy feel!!
We aged around the 'Top Note' using some 'Soft Suede' ink and a 'Sponge Dauber' and attached it to the cardbase using some 'Dimensionals'. Finally we stamped the christmas sentiment - also from the 'Beautiful Season' set (using 'Cherry Cobbler' ink and then punched it out using the 'Scallop Oval Punch', again raised with 'Dimensionals' to give it a raised effect.
I think you'll agree, a beautiful card! Would you like to make a lovely christmas card using the new Stampin' Up! products. Why not come to my catalogue launch party on the 22nd October. Email me to confirm your place: amyjtidd@gmail.com
Thursday, 19 May 2011
Strength and Hope Tag
Hi all, hope you are well! I've been a bit poorly but on the mend now... i really should be working but needed a break from lesson planning and mock marking so decided to write this blog post...
I have recieved some interest about the 'Strength and Hope' stampset after featuring it on my blog the other day, so i thought that i would share with you another project made using this stunning set. This is a little something i made last week at our weekly craft club at work and it's a project especially for you Glitter Geeks:
I've quite simply used a luggage tag (available from any good stationary shop) and using 'Crumb Cake' ink stamped the swirly design from the 'Strength and Hope' set directly onto it. The Butterfly's have been stamped using 'Baja Breeze' ink onto 'Whisper White' card and then cut out. I have used some 'Basic Pearls' to embellish them. I then used my '2-way Glue Pen' to draw all over the butterfly and then applied liberally 'Dazzling Diamond' glitter. Unfortunately the camera hasn't picked up the glitter very well but trust me lots and lots has been used! I simply used 'Dimensionals' to raise and adhese the butterflies to the tag.
I love buying and giving presents. I personally take a lot of enjoyment from wrapping up the presents and making them look all lovely for the recipient. I often use the lovely DSP from Stampin' Up! to wrap up little gifts and when i do i always try to make a coordinating gift tag!!
I have recieved some interest about the 'Strength and Hope' stampset after featuring it on my blog the other day, so i thought that i would share with you another project made using this stunning set. This is a little something i made last week at our weekly craft club at work and it's a project especially for you Glitter Geeks:
I've quite simply used a luggage tag (available from any good stationary shop) and using 'Crumb Cake' ink stamped the swirly design from the 'Strength and Hope' set directly onto it. The Butterfly's have been stamped using 'Baja Breeze' ink onto 'Whisper White' card and then cut out. I have used some 'Basic Pearls' to embellish them. I then used my '2-way Glue Pen' to draw all over the butterfly and then applied liberally 'Dazzling Diamond' glitter. Unfortunately the camera hasn't picked up the glitter very well but trust me lots and lots has been used! I simply used 'Dimensionals' to raise and adhese the butterflies to the tag.
I love buying and giving presents. I personally take a lot of enjoyment from wrapping up the presents and making them look all lovely for the recipient. I often use the lovely DSP from Stampin' Up! to wrap up little gifts and when i do i always try to make a coordinating gift tag!!
Wednesday, 27 April 2011
My Very First Step Card!!
Hi all, as many of you may know i'm an avid follower of my upline's blog Blue Angel Crafts. Cate regularly posts her projects and they are always inspiring! Recently Cate posted a stepped card. This is a style of card i have never attempted before but i decided to give it a go!! I took Cate's advice and found a tutorial (on SCS) as it certainly wasn't simple!! Here's my attempt:
The cardbase is 'Pretty in Pink' from the 'subtles' collection. The cupcake and the sentiment are from the 'Crazy For Cupcakes' stampset. I used by 'Blender Pens' to colour in the cupcake and used a '2-way Glue Pen' to apply some 'Dazzling Diamond' glitter! The ribbon featured in this project is the beautiful 'Rose Red' 'Binding Ribbon' from the Mini Catalogue. The final step uses 'Whisper White' cardstock and the large background stamp from 'Baroque Motifs' stampset. The Butterfly has been created using my 'Big Shot and the 'Beautiful Wings Embosslits Die'. I have finished off the butterfly using a string of 'Basic
Pearls'. I'd love to know what you think!
I made this card to give to a very good friend of mine, Ruth. It's her birthday today, so HAPPY BIRTHDAY RUTHIE!!! Hope you have a lovely day!! xxx
The cardbase is 'Pretty in Pink' from the 'subtles' collection. The cupcake and the sentiment are from the 'Crazy For Cupcakes' stampset. I used by 'Blender Pens' to colour in the cupcake and used a '2-way Glue Pen' to apply some 'Dazzling Diamond' glitter! The ribbon featured in this project is the beautiful 'Rose Red' 'Binding Ribbon' from the Mini Catalogue. The final step uses 'Whisper White' cardstock and the large background stamp from 'Baroque Motifs' stampset. The Butterfly has been created using my 'Big Shot and the 'Beautiful Wings Embosslits Die'. I have finished off the butterfly using a string of 'Basic
Pearls'. I'd love to know what you think!
I made this card to give to a very good friend of mine, Ruth. It's her birthday today, so HAPPY BIRTHDAY RUTHIE!!! Hope you have a lovely day!! xxx
Friday, 8 April 2011
Happy Engagement Fi and Anthony!!
Another day, and another good piece of news!! There is so much at the moment to celebrate! My good friend Fiona and her partner Anthony got engaged at the weekend and I'm just so happy for them!! I used to work with Fiona but she sadly moved away last year and i miss her lots! But we still stay in touch and we're planning on catching up in London over the Easter holidays!! Anyway, i couldn't resist making and sending a card. Here it is:
This card has the same colour theme as the one above. The sentiment is also from the 'Occasional Quotes' stampset. Maybe i'll keep this on to give on Fi and Anthony's big day!!! I'm looking forward to meeting up and chatting wedding plans!!!
It's the last day of term today and then EASTER HOLIDAYS!!
The card is using Stampin' Up! shimmer card. I have used the 'Big Shot' and a the Stampin' Up! exclusive 'Manhattan Flower Embossing Folder'. I have used a '2-way glue pen' to apply 'Dazzling Diamond glitter'. The sentiment is from the Level 3 hostess set 'Occasional Quotes' stamped with 'Early Espresso' ink. The card has been finished off with some 'Early Espresso' 'Satin Ribbon'.
I love the 'Manhattan Flower Embossing 'Folder' and it's such value for money at just £6.95. (Just to let you know that if you have a Cuttlebug you can still use these embossing folders!) To demonstrate to you the versatility of these embossing folders here is another card using this product:
This card has the same colour theme as the one above. The sentiment is also from the 'Occasional Quotes' stampset. Maybe i'll keep this on to give on Fi and Anthony's big day!!! I'm looking forward to meeting up and chatting wedding plans!!!
It's the last day of term today and then EASTER HOLIDAYS!!
Friday, 1 April 2011
The Mini Catalogue is Here ... and there's a new BIG SHOT in town!!
I'm so excited! Finally the Mini Catalogue is here and it includes lots and lots of AMAZING NEW PRODUCTS for us all to fall in love with!!
Probably the biggest and most exciting item in the catalogue is the 'Sizzix Big Shot' for Stampin' Up! The 'Big Shot' is a sturdy manual die cutting machine used to die cut materials for use on crafts on all your craft projects. You'll love what the 'Big Shot' machine can do for you!
The use of this die is endless!! But the most obvious use for this 'Die' is for wedding favours!! You can cut out five of these at a time! So all of a sudden a time consuming task becomes a very speedy process! The 'Big Shot' machine cuts out the shape, scores the box and creates perforated lines all in an instant! They are so quick to construct! Heres a close up of each of these boxes with a brief description of each:
This first pillow box uses 'Basic Black' cardstock. I have used the 'Bella Toile' background stamp and white embossing powder to create the design. This pillow box has been finished with some 'Whisper White Organza Ribbon'
This second pillow box uses 'Bashful Blue' cardstock. The flower has been constructed by gluing alternating 'Scallop punches' of 'Bashful Blue and 'Early Espresso' card, with a 'Basic Rhinestone' placed in the middle. This box has been finished with a small snip of 'Early Espresso' 'Satin Ribbon. I have also edged the box with a 'Sponge Dauber' and 'Early Espresso' ink!
This final pillow box is using 'Rose Red' card stock. The butterfly has been stamped on 'Whisper White' cardstock using the stamps from the 'Flight of the Butterfly' stampset, using 'Pink Pirouette' and 'Rose Red'. The butterfly has been embellished with some 'Basic Pearls' and i have used a '2-way glue pen' and some 'Dazzling Diamond' glitter to bling it up! The box has been finished off using some 'Whisper White' Satin Ribbon!
I hope that these projects have got you as excited about the mini catalogue as i am! All the products in there are beautiful - I WANT THEM ALL! I will be sharing with you lots of projects using some of these products over the coming weeks! So please keep visiting my blog!! Have a good weekend! xxx
Probably the biggest and most exciting item in the catalogue is the 'Sizzix Big Shot' for Stampin' Up! The 'Big Shot' is a sturdy manual die cutting machine used to die cut materials for use on crafts on all your craft projects. You'll love what the 'Big Shot' machine can do for you!
- You can use the 'Big Shot' to create projects quickly and easily. You can cut out intricate designs, plus create multiple cut outs at the same time. (Great for example if you need to make lots of wedding favours!)
- The Stampin’ Up! 'Big Shot' line features exclusive designs that can’t be found anywhere else!
The great thing about the 'Stampin Up!' 'Big Shot' is:
The use of this die is endless!! But the most obvious use for this 'Die' is for wedding favours!! You can cut out five of these at a time! So all of a sudden a time consuming task becomes a very speedy process! The 'Big Shot' machine cuts out the shape, scores the box and creates perforated lines all in an instant! They are so quick to construct! Heres a close up of each of these boxes with a brief description of each:
This first pillow box uses 'Basic Black' cardstock. I have used the 'Bella Toile' background stamp and white embossing powder to create the design. This pillow box has been finished with some 'Whisper White Organza Ribbon'
This second pillow box uses 'Bashful Blue' cardstock. The flower has been constructed by gluing alternating 'Scallop punches' of 'Bashful Blue and 'Early Espresso' card, with a 'Basic Rhinestone' placed in the middle. This box has been finished with a small snip of 'Early Espresso' 'Satin Ribbon. I have also edged the box with a 'Sponge Dauber' and 'Early Espresso' ink!
This final pillow box is using 'Rose Red' card stock. The butterfly has been stamped on 'Whisper White' cardstock using the stamps from the 'Flight of the Butterfly' stampset, using 'Pink Pirouette' and 'Rose Red'. The butterfly has been embellished with some 'Basic Pearls' and i have used a '2-way glue pen' and some 'Dazzling Diamond' glitter to bling it up! The box has been finished off using some 'Whisper White' Satin Ribbon!
I hope that these projects have got you as excited about the mini catalogue as i am! All the products in there are beautiful - I WANT THEM ALL! I will be sharing with you lots of projects using some of these products over the coming weeks! So please keep visiting my blog!! Have a good weekend! xxx
Subscribe to:
Posts (Atom)